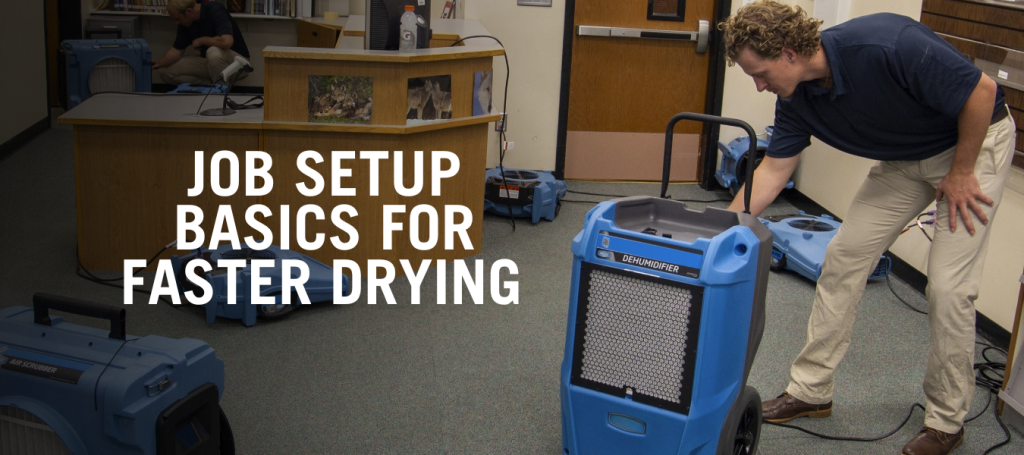
Water damage doesn’t observe a regular business schedule. Oftentimes, crews must extract water and place equipment after hours, when managers or supervisors may not be available to guide the setup. This places the burden on sometimes less experienced technicians or even temporary help to start the job.
One key to effective restoration is properly sizing drying equipment. Deploying the correct amount of high-performance air movers, dehumidifiers, and air filtration units on the job ensures the most rapid structural drying and prevents the possibility of secondary problems like mold and damage to humidity-sensitive materials. On the other hand, improper sizing can lead to drying inefficiency, wasted resources, and prolonged customer downtime that results in complaints.
Mastering this essential skill – and how to do it quickly – will help ensure better outcomes and more thorough, efficient drying. Ideally technicians would use a specialized mobile app to produce almost instant, very accurate equipment calculations. However, in the absence of such an app, restoration teams can use the following basic guidance as a starting point.
Equipment Types
Effective water damage restoration relies first on understanding the roles of the industry’s most essential tools. Professional-grade air movers and dehumidifiers are the backbone of the drying process, each playing a pivotal role. Air movers blend warm, dry air directly on the surfaces of wet materials, supporting high evaporation, while dehumidifiers continually remove the humidity from the air. Together, these tools of airflow and humidity control result in a balanced drying system, driving rapid moisture removal out of wet, affected materials.
Know that it’s essential to use LGR or low-grain refrigerant dehumidifiers that are engineered to produce the driest air – this is especially crucial during the latter part of the project when the moisture in materials is most difficult to remove.
Air filtration units, or air scrubbers, are equally important on the job at a water damage site. They improve and maintain indoor air quality by capturing airborne particles like mold spores, fine dust, and other incidental particles that can lift off surfaces during the drying process. Adding air scrubbers helps protect the health of occupants (and restorers) and creates a cleaner, safer environment as the work is completed.
Key First Steps
First, create a “drying chamber” by closing doors to adjacent unaffected spaces and work toward achieving an air temperature of 70°F (21.1°C) or warmer in the affected area to be dried.
There are several key factors to consider before sizing equipment for the job:
- Size of the Affected Area: Using moisture meters, define the drying chamber by determining how far the water has spread. Starting from the source of flooding, thoroughly inspect and check for visible and invisible moisture that has migrated up or down walls and across ceilings and flooring, and inside and around all structural features (closets, bay windows, staircases, etc.).
- Water Absorption: In high-absorption situations, drying requires more dehumidification. For the purposes of this guide, let’s assume that most water damage jobs have substantial deep water absorption in floors, subfloor structures, and at least a portion of wall structures, thus requiring more aggressive dehumidification and airflow to dry the deeply wet, dense structural materials.
How to Calculate Equipment Needs
Now that initial inspections have taken place, take the following steps to calculate how much of each type of equipment to place initially.
1. Room Size – Measure the entire area affected and calculate cubic feet by multiplying room length by width by ceiling height.
Length x Width x Height = Cubic Feet of Area
Example: An area 50 feet long by 40 feet wide with 10-foot ceilings yields 20,000 cubic feet of air to be dehumidified.
2. Dehumidifiers – Placing the right number of dehumidifiers helps ensure the indoor humidity will not linger above 60% RH and that it decreases to 40% relative humidity (RH) or lower after the first 24 hours of drying. After that, make sure to maintain 40% RH or less (lower is better) at 70°F (21.1°C) or warmer through the end of the project.
Given high water absorption conditions, divide the area’s total cubic footage by 40 to determine how many pints per day must be removed. Then check your available dehumidifiers’ pints-per-day water removal at AHAM (80°F/60% RH) to determine which dehumidifiers to use and how many are required.
Example: A 20,000 cu. ft. area divided by a factor of 40 equals 500. The Dri-Eaz LGR 6000Li dehumidifier has an AHAM water removal capacity of 100 pints per day, thus requiring five dehumidifiers.
3. Air Movers – Enough air movers must be placed to ensure that airflow is directed at all wet surfaces. Start by calculating the area’s square footage (room length by width), then divide this number by 50 to determine how many air movers to place initially.
Length x Width = Square Feet of Area
Example: A wet room 50 feet long by 40 feet wide is 2,000 square feet – and 2,000 divided by 50 equals 40, so a minimum of 40 air movers would be needed to cover this large area. If needed, place additional air movers to ensure direct airflow on 100% of all wet materials.
4. Air Scrubbers – Add one air filtration device per dehumidifier to start. Place more if needed for sufficient air filtration.
Example: Five air scrubbers are sufficient in the above scenario.
For some larger water damage jobs, it may be more efficient or even necessary to manage the flooded space as more than one drying chamber. For example, flooded commercial offices must be managed separately from a flooded work area that is adjacent if the door connecting the two must remain closed. In cases like this, equipment calculations are done for each distinct air space/drying chamber.
By using obsolete job classification methods or guessing at equipment sizing, many restoration contractors underestimate the amount of equipment needed to dry aggressively and thoroughly. Using the above sizing guide provides the basics for rapid and efficient drying on residential restoration jobs.
Important Equipment Placement Considerations
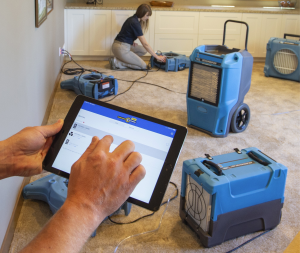 Air movers should be set on their highest speed and arranged to blow in a circular path around the room, with air being forced in and out of and against every structural feature, with every square inch of wet, affected materials receiving strong airflow. With this high level of airflow, dehumidifiers and air scrubbers can be placed almost anywhere in the affected space, and the drying conditions will be stable throughout the space. This approach will result in even, consistent, and thorough drying of the affected wet materials wherever they are.
To be able to run as many air movers as needed, outfit crews with high-performing low-amp air movers, as older air movers often demand significantly more power. In fact, three or four premium restoration air movers can operate in place of an older, high-amp air mover while drawing the same amps and providing far greater airflow coverage.
Avoid directing airflow straight into the dehumidifier’s intake, which can disrupt performance.
Do not allow the very warm, extremely dry air from dehumidifier outlets to exhaust directly onto finished wood surfaces (cabinetry or furniture), as it can cause damage.
Best Practices for Speed & Accuracy
Beyond these basic considerations, implementing some additional best practices will help ensure accurate equipment sizing and faster, more efficient drying.
- Leverage technology tools like mobile apps, remote monitoring sensors, and worksite management systems. These can save time and resources when logging measurements and tracking progress.
- Make sure technicians know they can scan QR codes on product labels or control screens to access manufacturer websites and online manuals to acquire quick information about equipment specifications vital to sizing, such as dehumidifier capacity.
- Be prepared to adapt to evolving conditions mid-job, as the situation can change quickly. Monitor ambient conditions remotely via mobile apps, e.g., those built into current dehumidifiers, plus use moisture meters to take daily readings in materials, checking for hidden dampness or areas slower to dry – then add or remove equipment as needed.
- Use the best, most effective equipment and keep all units clean and well-maintained. Implement preventative maintenance practices to ensure equipment is always ready, such as checking electrical cords and plugs for damage and changing filters regularly.
Sizing with Confidence and Clarity
Water damage jobs often involve stress, urgency, and uncertainty, especially when they occur outside regular business hours and decisions must be made on the fly. Proper sizing matters – it leads to faster drying, minimized damage, and satisfied customers.
These simple calculations and sizing strategies help make the drying process more straightforward and easier to quickly customize for each job, no matter how chaotic the situation.
Brendan Kimmel
 Brendan Kimmel managed a full-service cleaning and disaster restoration firm for over six years in the greater Seattle area before becoming a Restoration Sciences Academy instructor with Legend Brands in 2008. He is an IICRC Certified “Triple Master,” an IICRC approved Water Restoration and Cleaning Instructor, and a Water Loss Specialist with the RIA.
Related Posts